The short answer
- Every 3D print starts as a design file that software cuts into thin layers, and the printer then builds the part one layer at a time.
- Most home printers melt plastic filament and push it through a nozzle, much like a hot glue gun.
- Warping, a clogged nozzle and a bed that is not level are the usual first-print trouble spots.
You have just unboxed a new printer, downloaded a model of a phone stand, and pressed print. For the next hour the machine does something that looks like magic and is really a very patient routine: a design file is cut into thin layers, and the printer lays down one layer at a time until the object is finished.
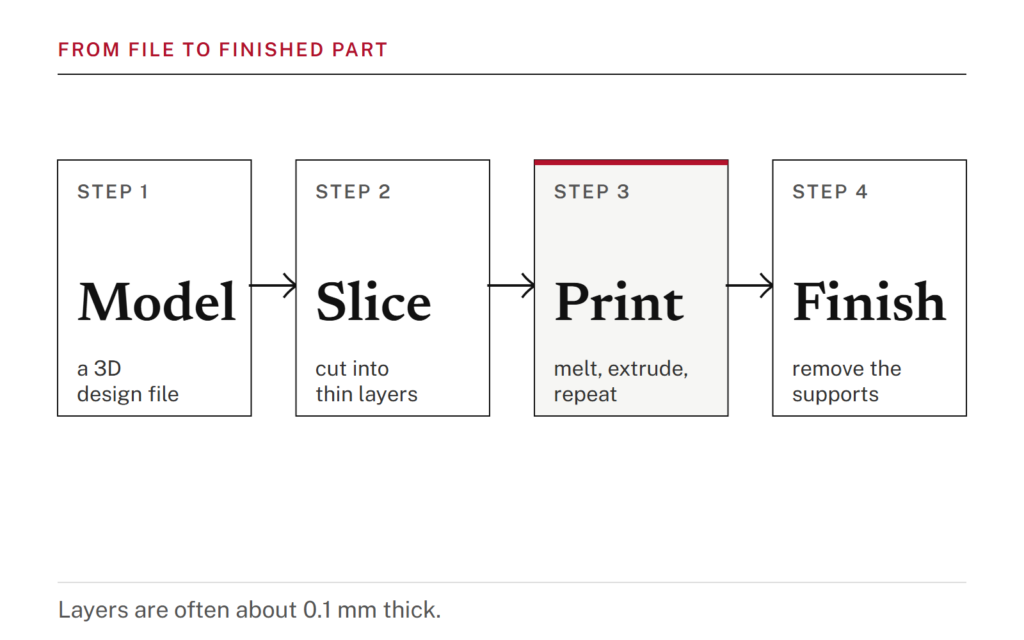
It starts with a file, not a machine
Whatever the type of printer, the US Department of Energy describes the same basic steps. A design is made in computer-aided design (CAD) software, the printer is prepared with its material and its build platform, and then the machine takes over. The method is also called additive manufacturing, because material is added only where the file calls for it.
Home printing has one stage in the middle. A program called a slicer divides the design into thin flat cross-sections, which tell the printer where material goes in every layer. The slicing software then converts the model into G-code, which sets the toolpaths, speeds and temperatures the printer follows, according to the engineering publication Wevolver. CNC Kitchen, a maker site, describes G-code as just a list of commands that the firmware runs one line after the other. The slicer also decides things such as when the part-cooling fan switches on and off, which is why changing material usually means changing slicer settings.
What happens inside the printer
Most desktop machines use material extrusion, the most common process in desktop printers. The material is filament, a plastic that comes on a spool. A drive motor draws it into a heated hot end that melts it, and the molten plastic is pushed out through a small nozzle. MatterHackers, a 3D printing retailer, calls the extruder “a fancy hot glue gun”.
Melting is only half the job, because the nozzle has to move. The motion system guides the nozzle along the X and Y axes to trace each layer, and after every layer the build plate or the print head steps along the Z axis, ready for the next one, Wevolver explains. Most printers use a Cartesian layout, and designs such as delta and CoreXY trade speed, build volume and complexity against each other. Because most printers use stepper motors with no position feedback, CNC Kitchen notes, a print begins with the machine moving to end stops at known positions, and a typical start routine then waits for the nozzle and bed to reach temperature before printing begins.
A few figures help when you read a spec sheet. MatterHackers says printers use filament in two diameters, 1.75 mm and 3 mm, and that a 0.4 mm nozzle is normal, with smaller nozzles for finer detail and larger ones for faster printing. Each layer is often about 0.1 millimeter thick, the Department of Energy says. The plastic cools almost immediately and fuses to the layer below, then the next layer goes down, and how long the job takes depends on how big and detailed the object is, from minutes to days.
Why a first print goes wrong
Some filament printers can be finicky. The University of North Texas Libraries, in a blog post comparing filament and resin printing, point out that the result depends on many variables, including software settings, the mechanics, upkeep and even the climate in the room. These are the usual trouble spots:
- Warping. Plastic shrinks slightly as it cools, so the edges of a part can curl up and peel off the bed. A heated bed helps the part stick and warp less by controlling how fast it cools, and printers without one are mostly limited to PLA, the material least prone to warping.
- A clogged nozzle. Nozzles can sometimes clog, and that ranks among the most common problems with 3D printers.
- An unlevel bed. Many printers level the bed against the nozzle automatically, but some must be calibrated by hand. More and more printers now ship with a leveling probe that starts the process.
After the print finishes
Every object needs a little post-processing. That can mean unsticking the part from the build platform, or removing support structures, which are temporary material printed to hold up overhangs. In powder processes it also means brushing off the excess powder.
Other kinds of printers
Extrusion is only one family. In 2012 the standards body ASTM International sorted additive manufacturing into seven broad categories. Resin printers, for example, harden a liquid resin layer by layer with light, and they are credited with very accurate parts and fine detail. In the version described by the University of North Texas Libraries, an LCD screen below a pool of resin projects light that cures each cross-section, and the printer then peels each cured layer away from the base so fresh resin can flow under the part for the next layer. The trade-offs are real: the resin has a strong smell that calls for a well-ventilated room, a finished part has to be washed in acetone to clear off uncured resin and then cured under UV light to gain strength, and filament prints are stronger for practical objects. Most of what you will meet at home is still the filament kind described above.
What to look for on a spec sheet
Three details connect straight back to the steps above: whether the bed is heated, whether it levels itself, and what nozzle size is fitted. A heated bed opens up more materials, automatic leveling removes one setup chore, and the nozzle size sets how fine or how fast a print can be. If resin printing tempts you, plan for ventilation and a washing and curing step as well.